VTEX Integration Guide – aCuotaz
This guide explains how to integrate aCuotaz as a payment method in your VTEX store and how to enable the Payment Mocker and Funding Limits behavior.
1. Prerequisites
Before you start, make sure you have:
- aCuotaz credentials:
client_idandsecret_tokenprovided by Apurata (both test and production). - Access to VTEX Admin with permissions for: Store Settings, Payment and Storefront / Checkout.
2. Configure aCuotaz as Provider
-
In VTEX Admin, go to:
Store Settings → Payment → Providers.
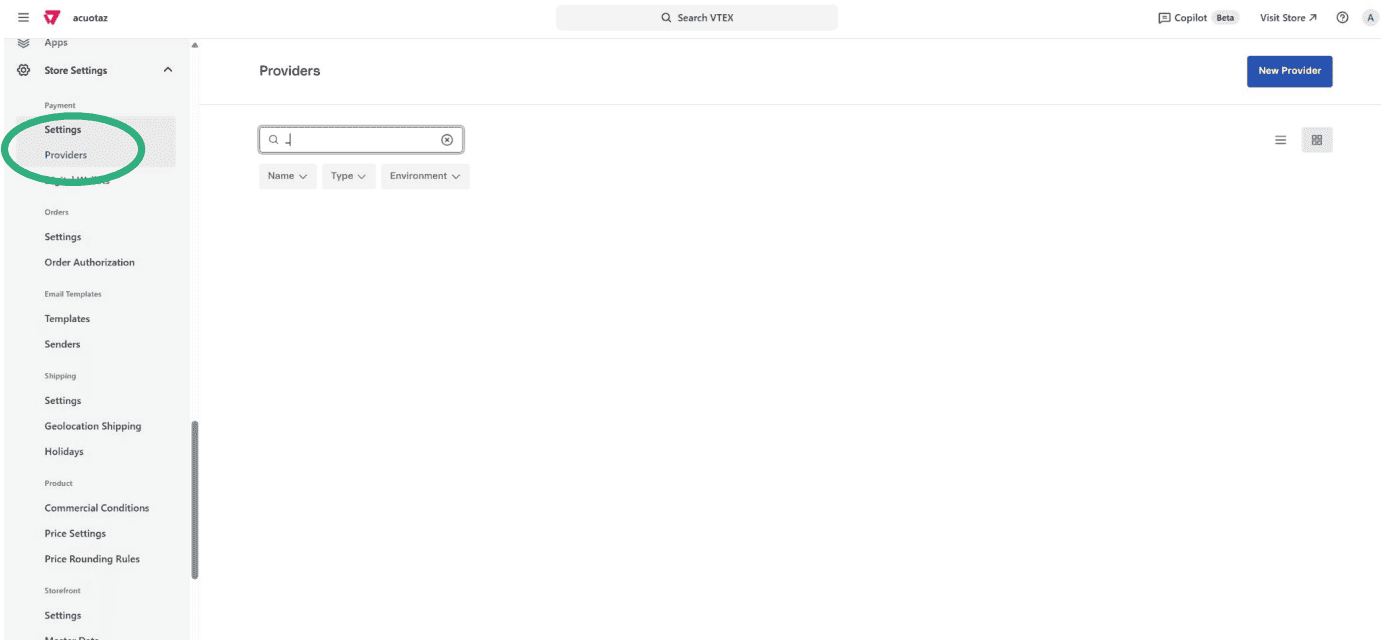
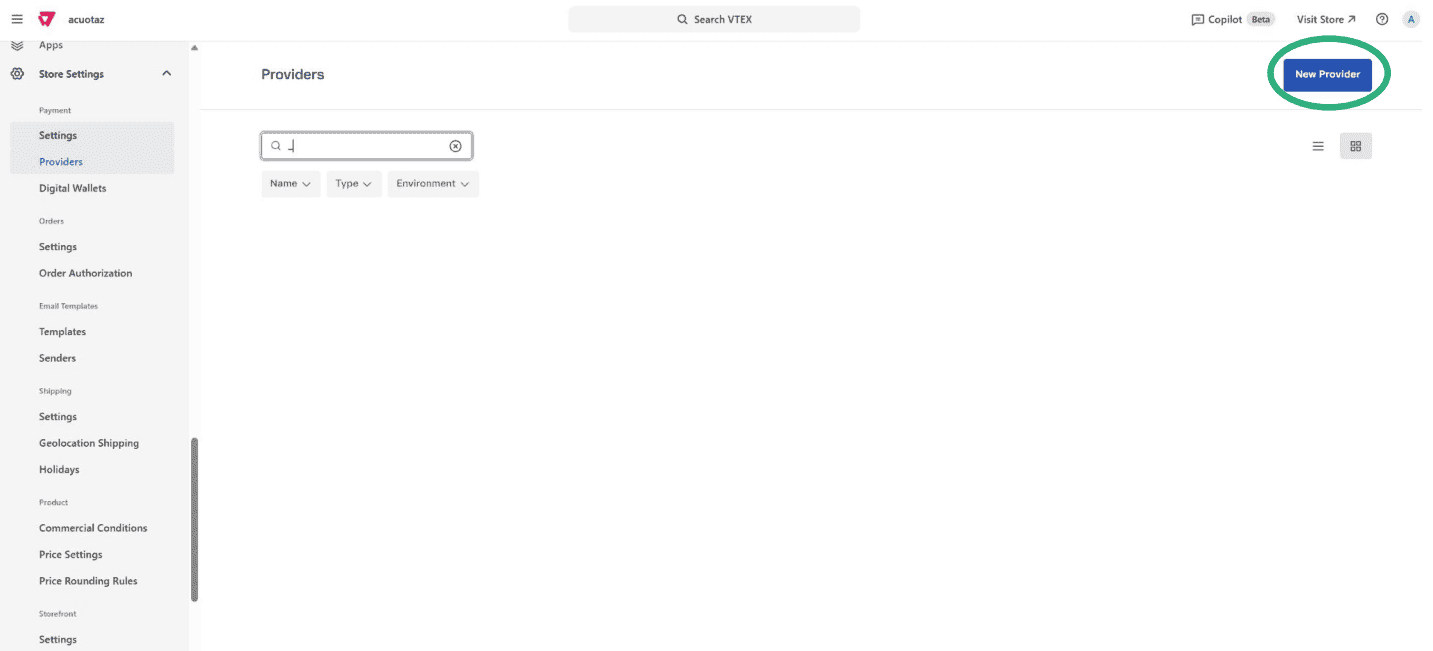
-
In the top‑right corner, click the New Provider button.
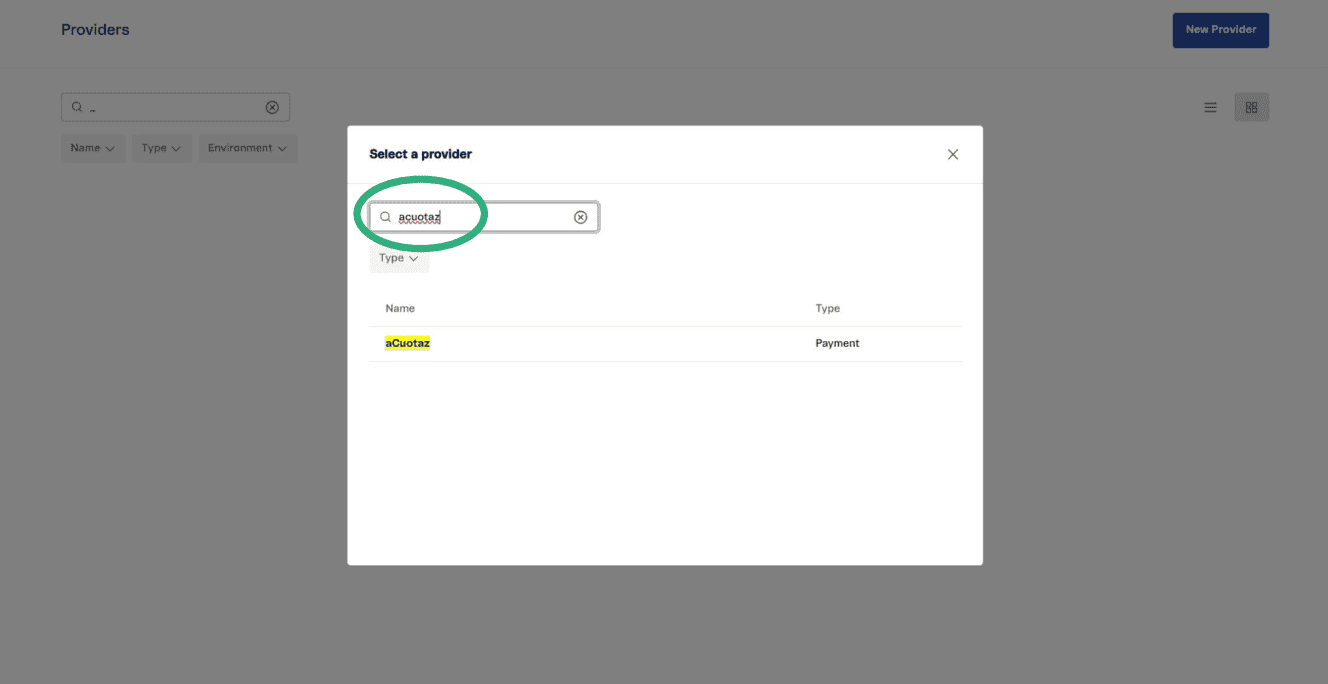
-
Search for “aCuotaz” in the list and select it.
-
In the Authentication section, leave App Key and App Token blank (do not change them).
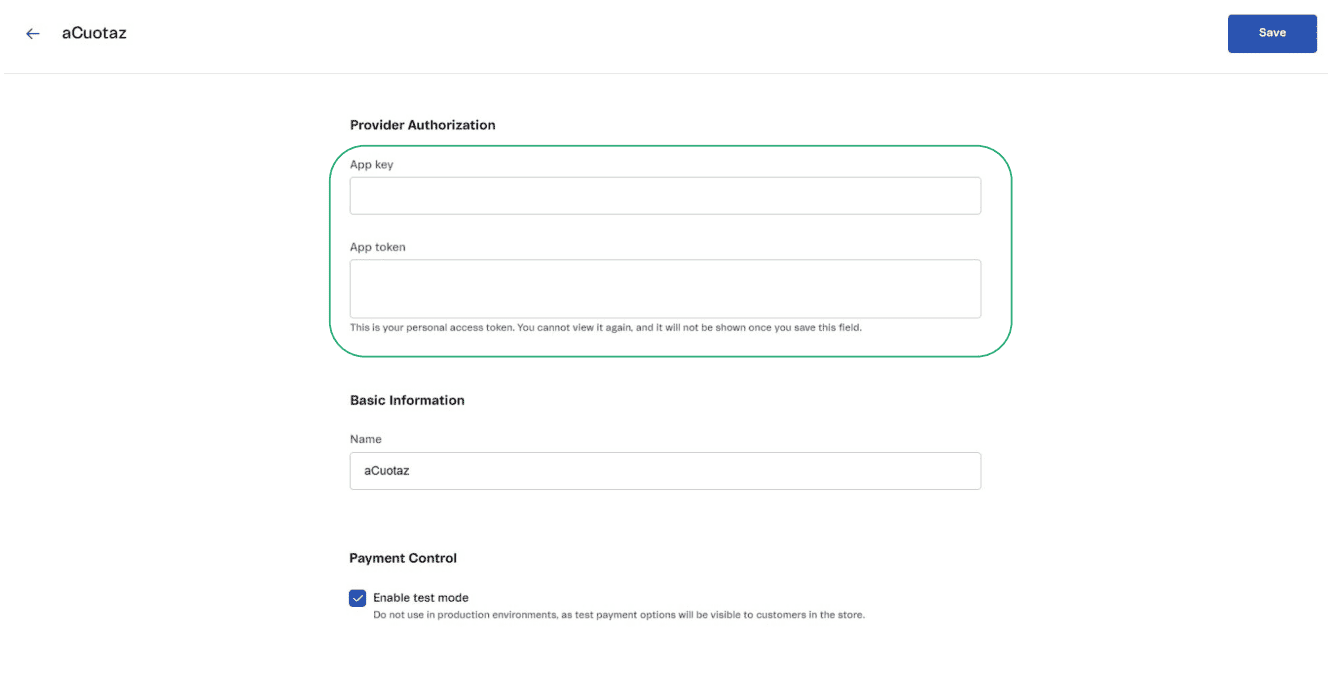
-
In the Provider Fields section, enter the credentials provided by Apurata: Client ID (
client_id), Secret Token (secret_token) and Currency (PEN).
Do not forget to save your changes.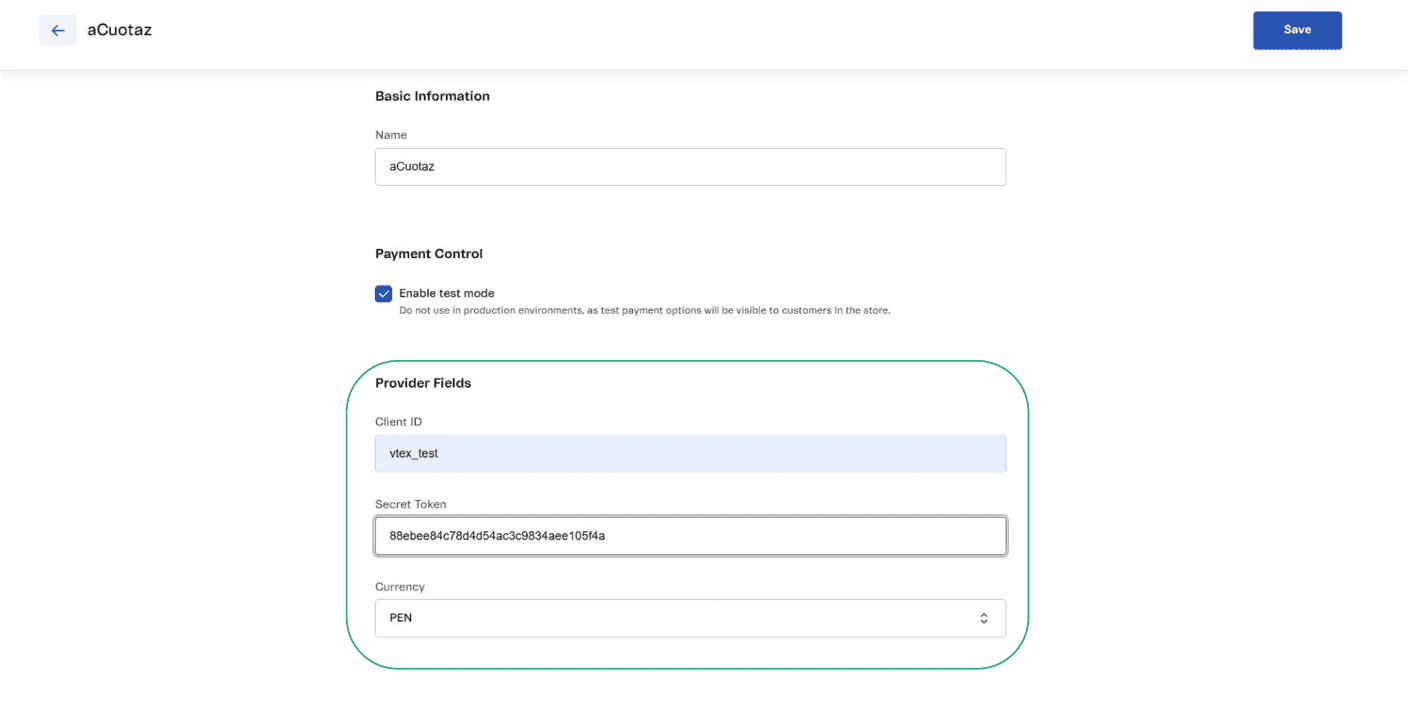
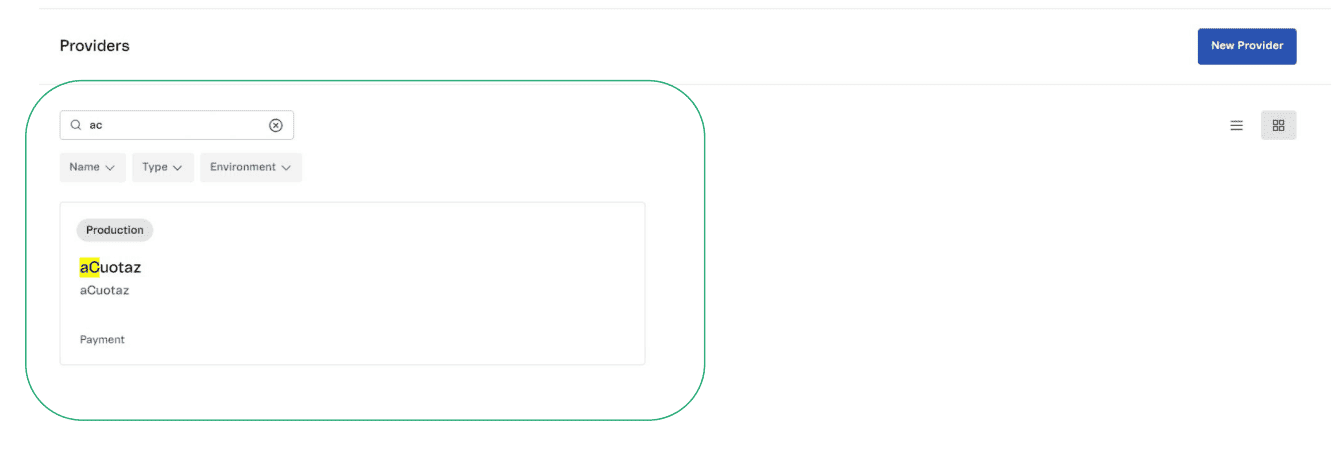
-
Confirm that aCuotaz appears in the Providers list.
-
Navigate to
Store Settings → Payment → Settingsin VTEX Admin. In the top-right corner, click the (+) button.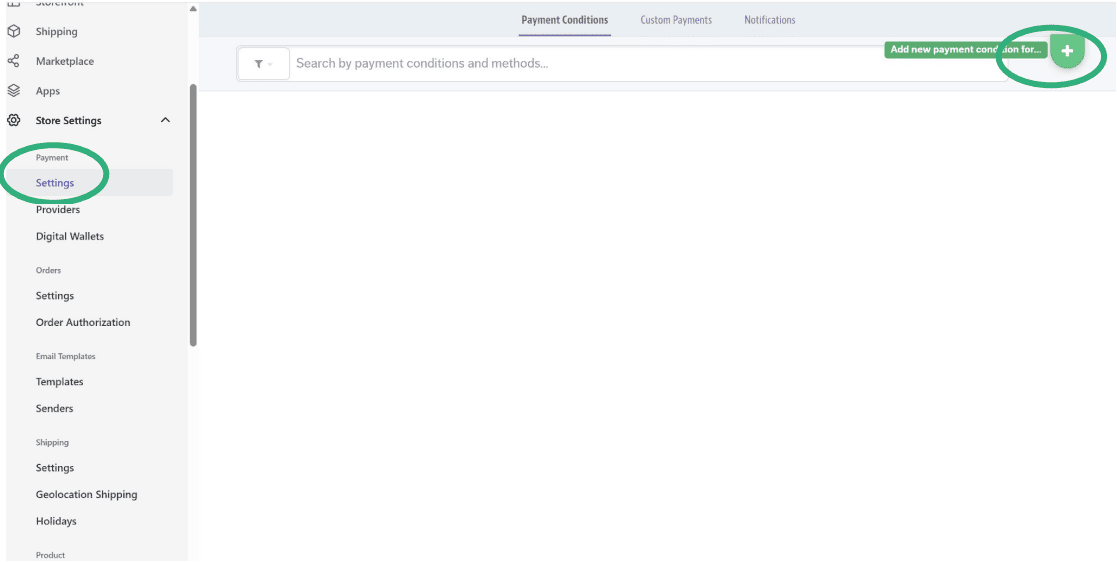
-
In the payment methods list, search for "aCuotaz" and select it.
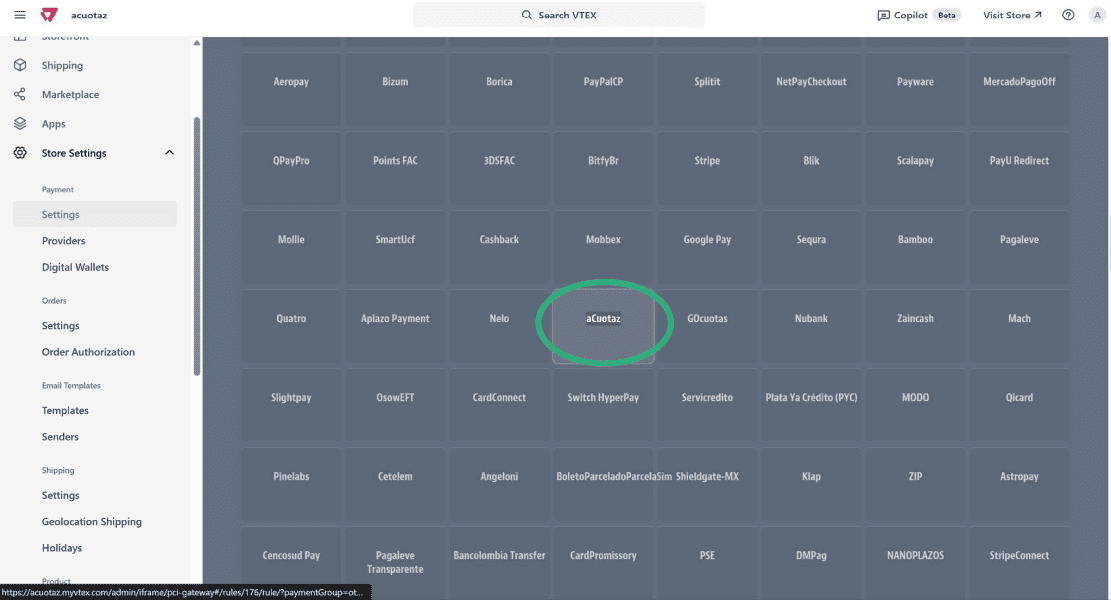
-
In the aCuotaz configuration panel, change the Status to
Active, and click Save to apply the changes.
-
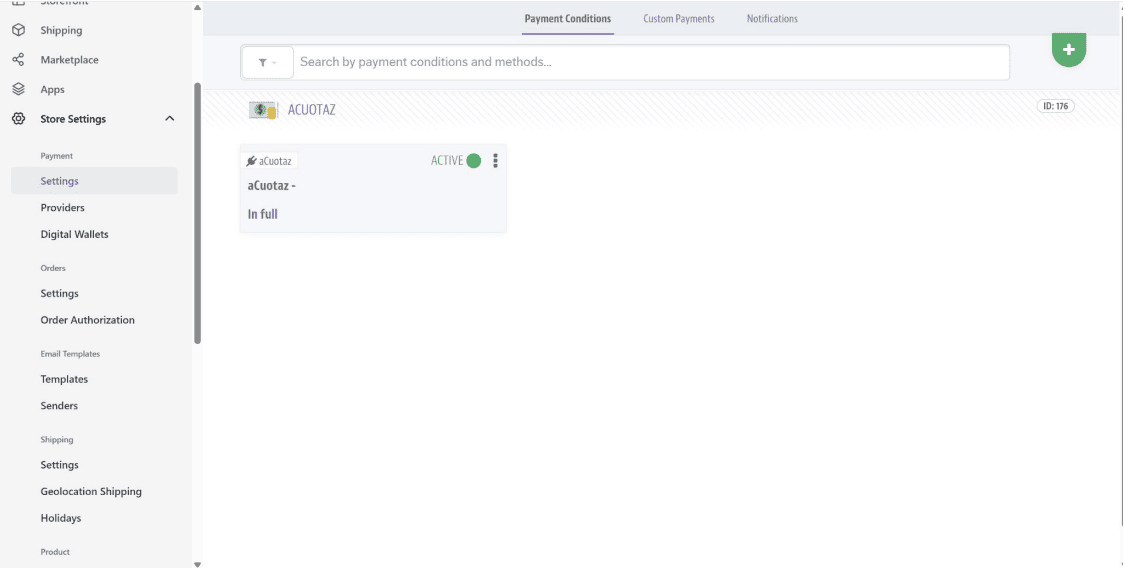
Confirm that aCuotaz has been successfully added and appears in the list of Payment Conditions.
3. Configure Payment Mocker & Funding Limits
This section enables the aCuotaz financing banner in the checkout and applies the funding limit logic for each customer and cart.
Important
Before starting with the following steps, make sure to replace the [client_id] field and copy the code provided at the following link: https://docs.apurata.com/POS/vtex_mocker/
-
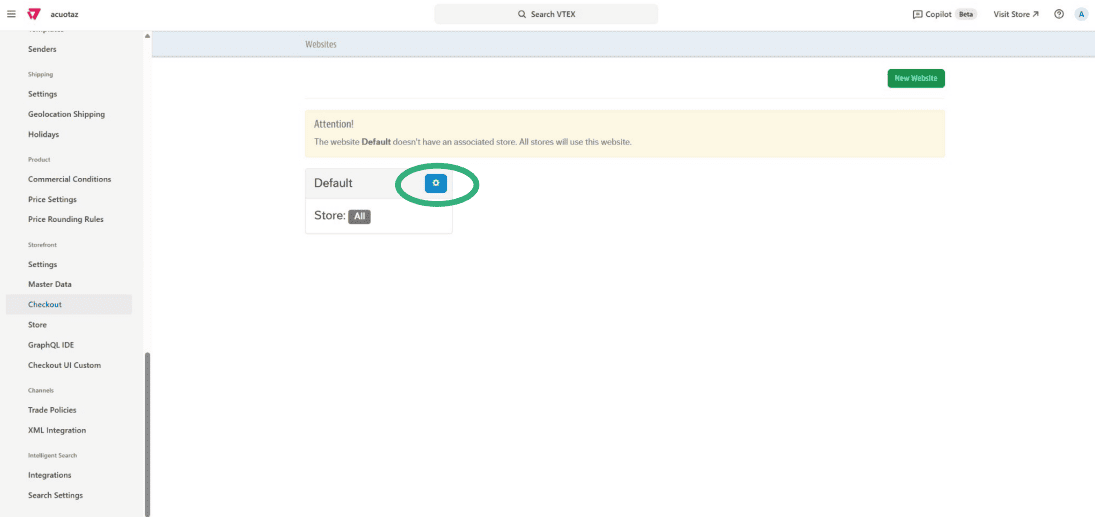
In the VTEX dashboard, go to
Store Settings → Storefront → Checkout.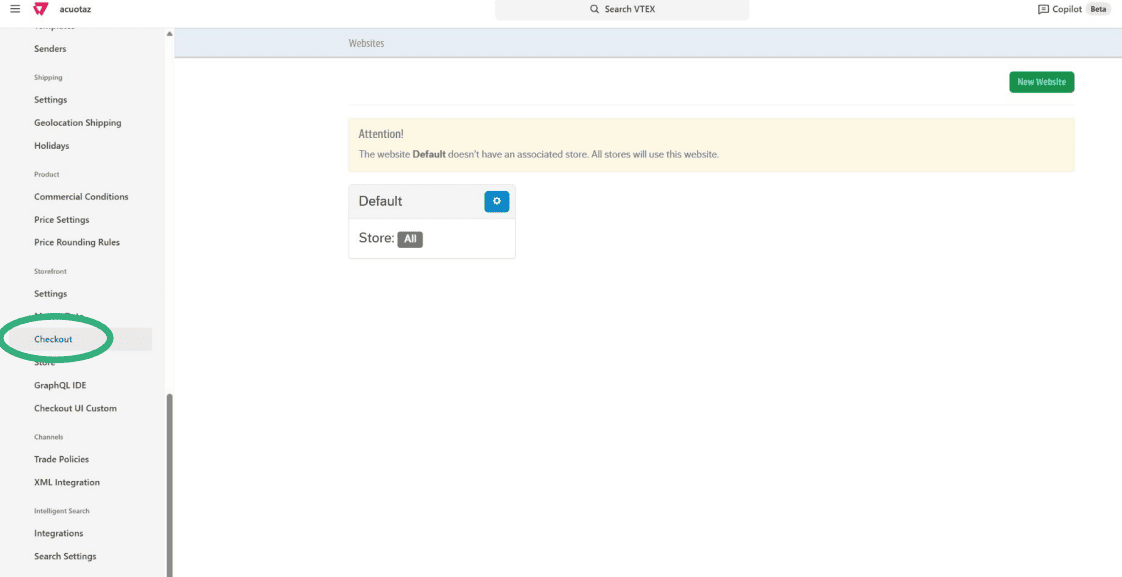
-
Click the settings (gear) icon.
-
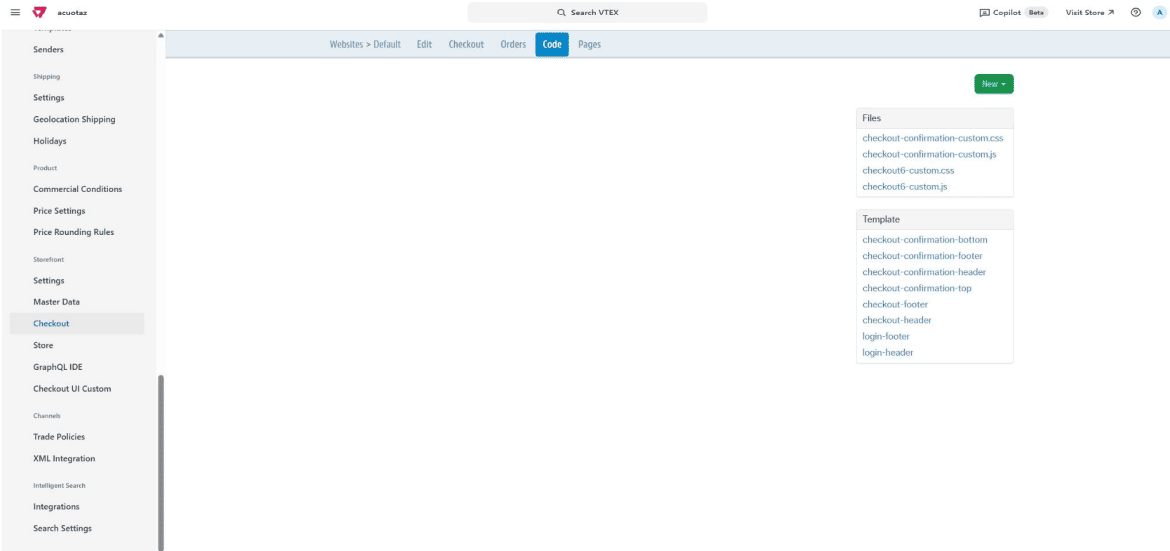
Select Code and then choose checkout6-custom.js.
-
Open the code file from the link provided earlier (https://docs.apurata.com/POS/vtex_mocker/). Make sure to replace the
client_idwith your actual client ID in the snippet. -
Copy and paste the code content (with your
client_idreplaced) into thecheckout6-custom.jsfile and save your changes.
Alternative Path
Note: If you encounter a warning or error when trying to access checkout6-custom.js in step 3, follow these alternative steps instead:
-
Navigate to
Store Settings → Storefront → Checkout UI Custom.
-
Select Javascript.

-
Copy and paste the code content (with your
client_idreplaced) and click Publish. Then proceed to see the examples below.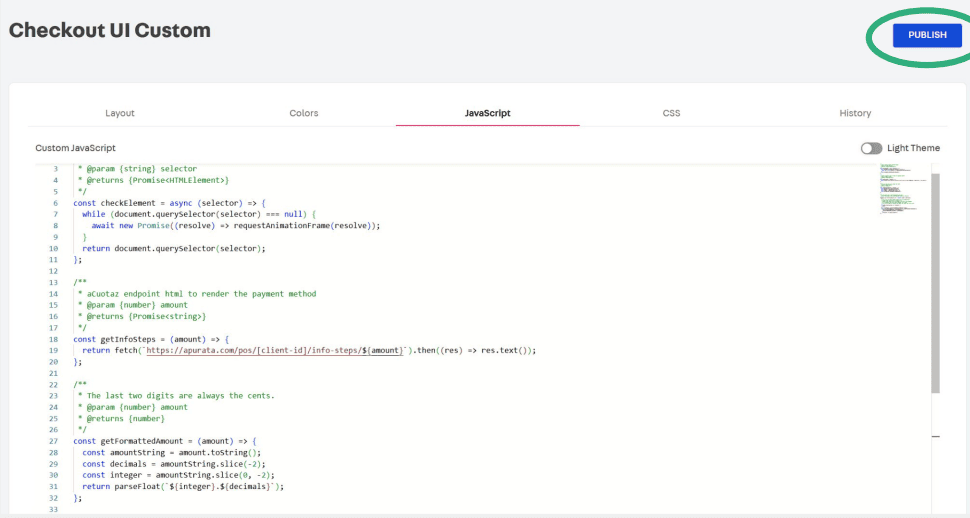
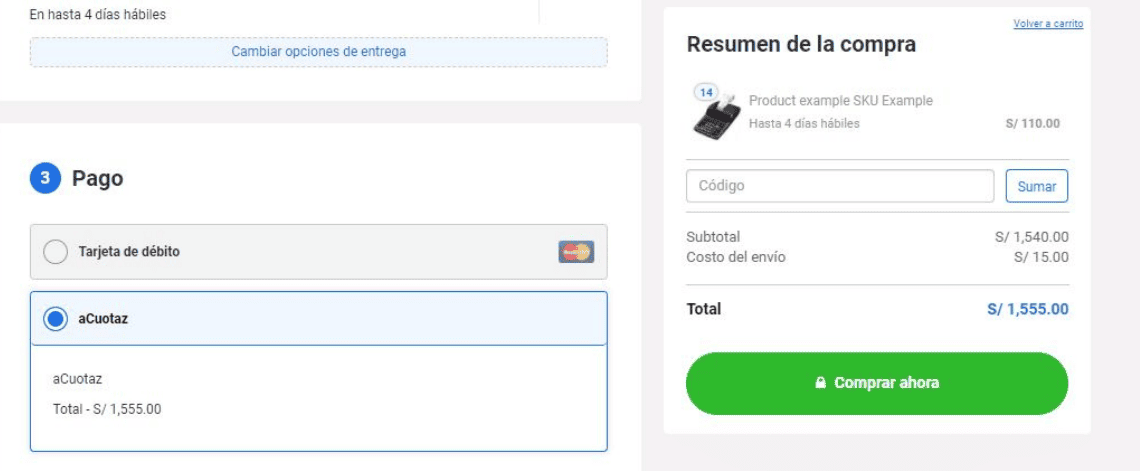
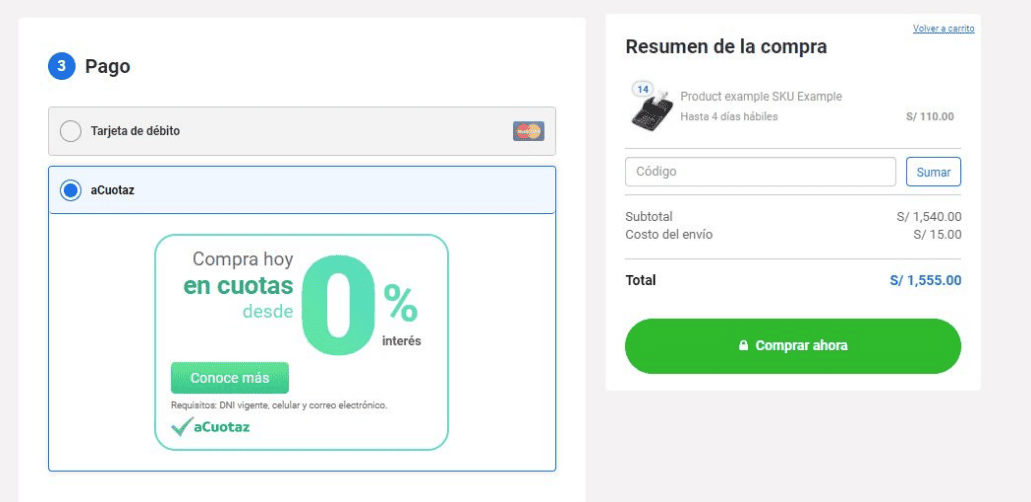
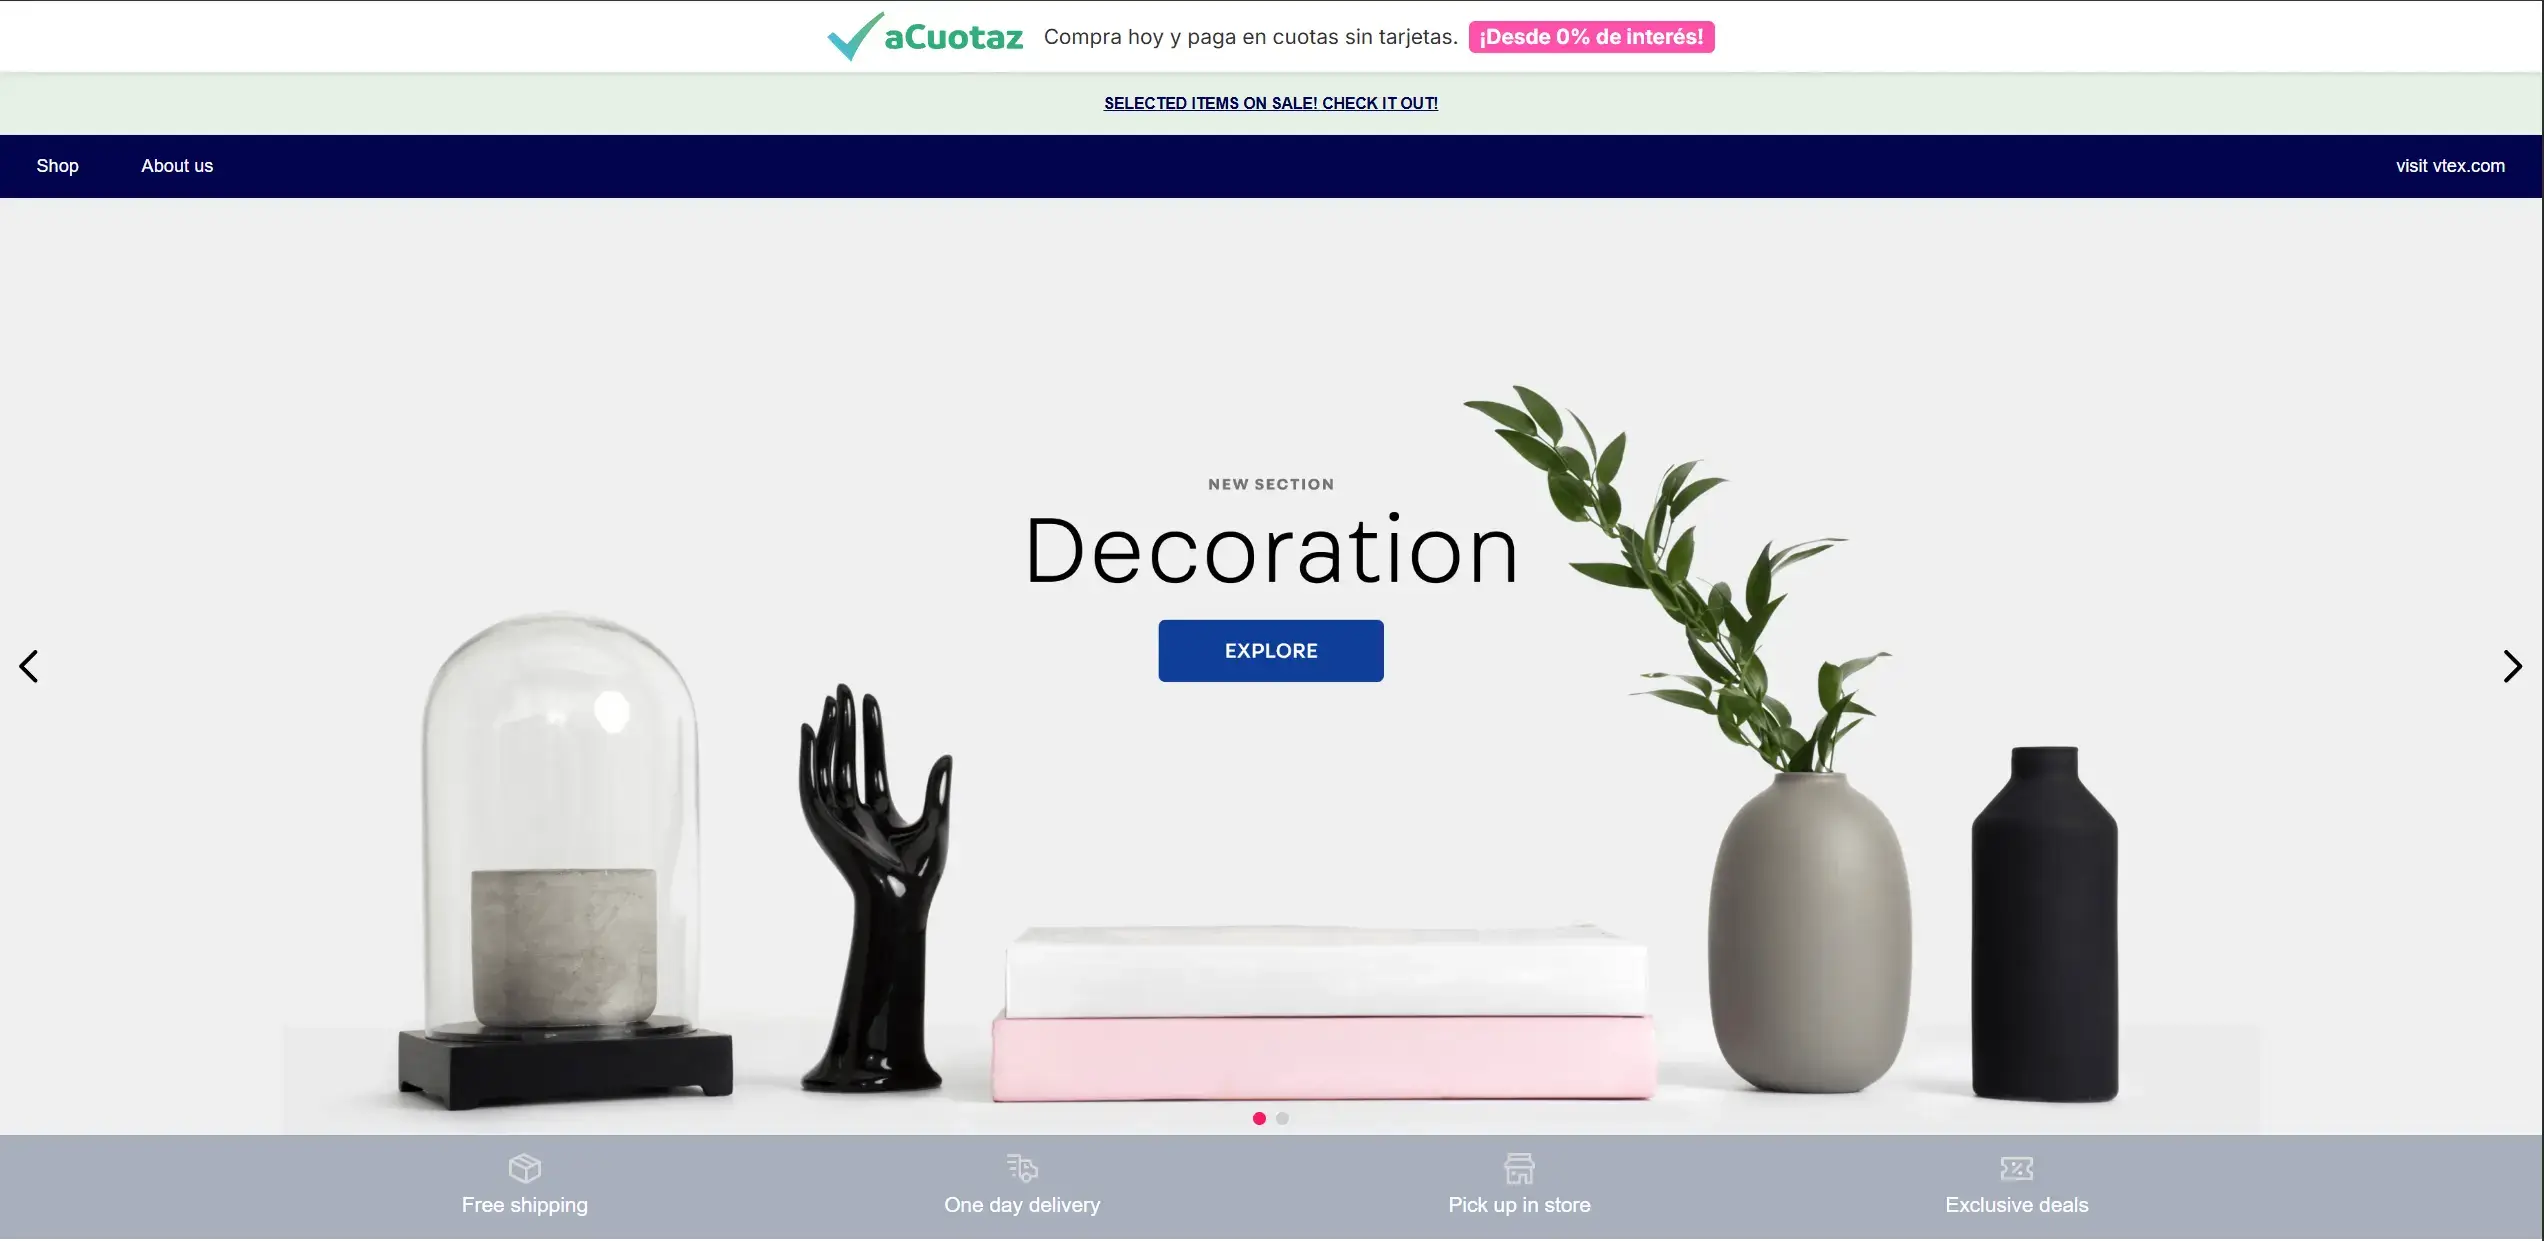
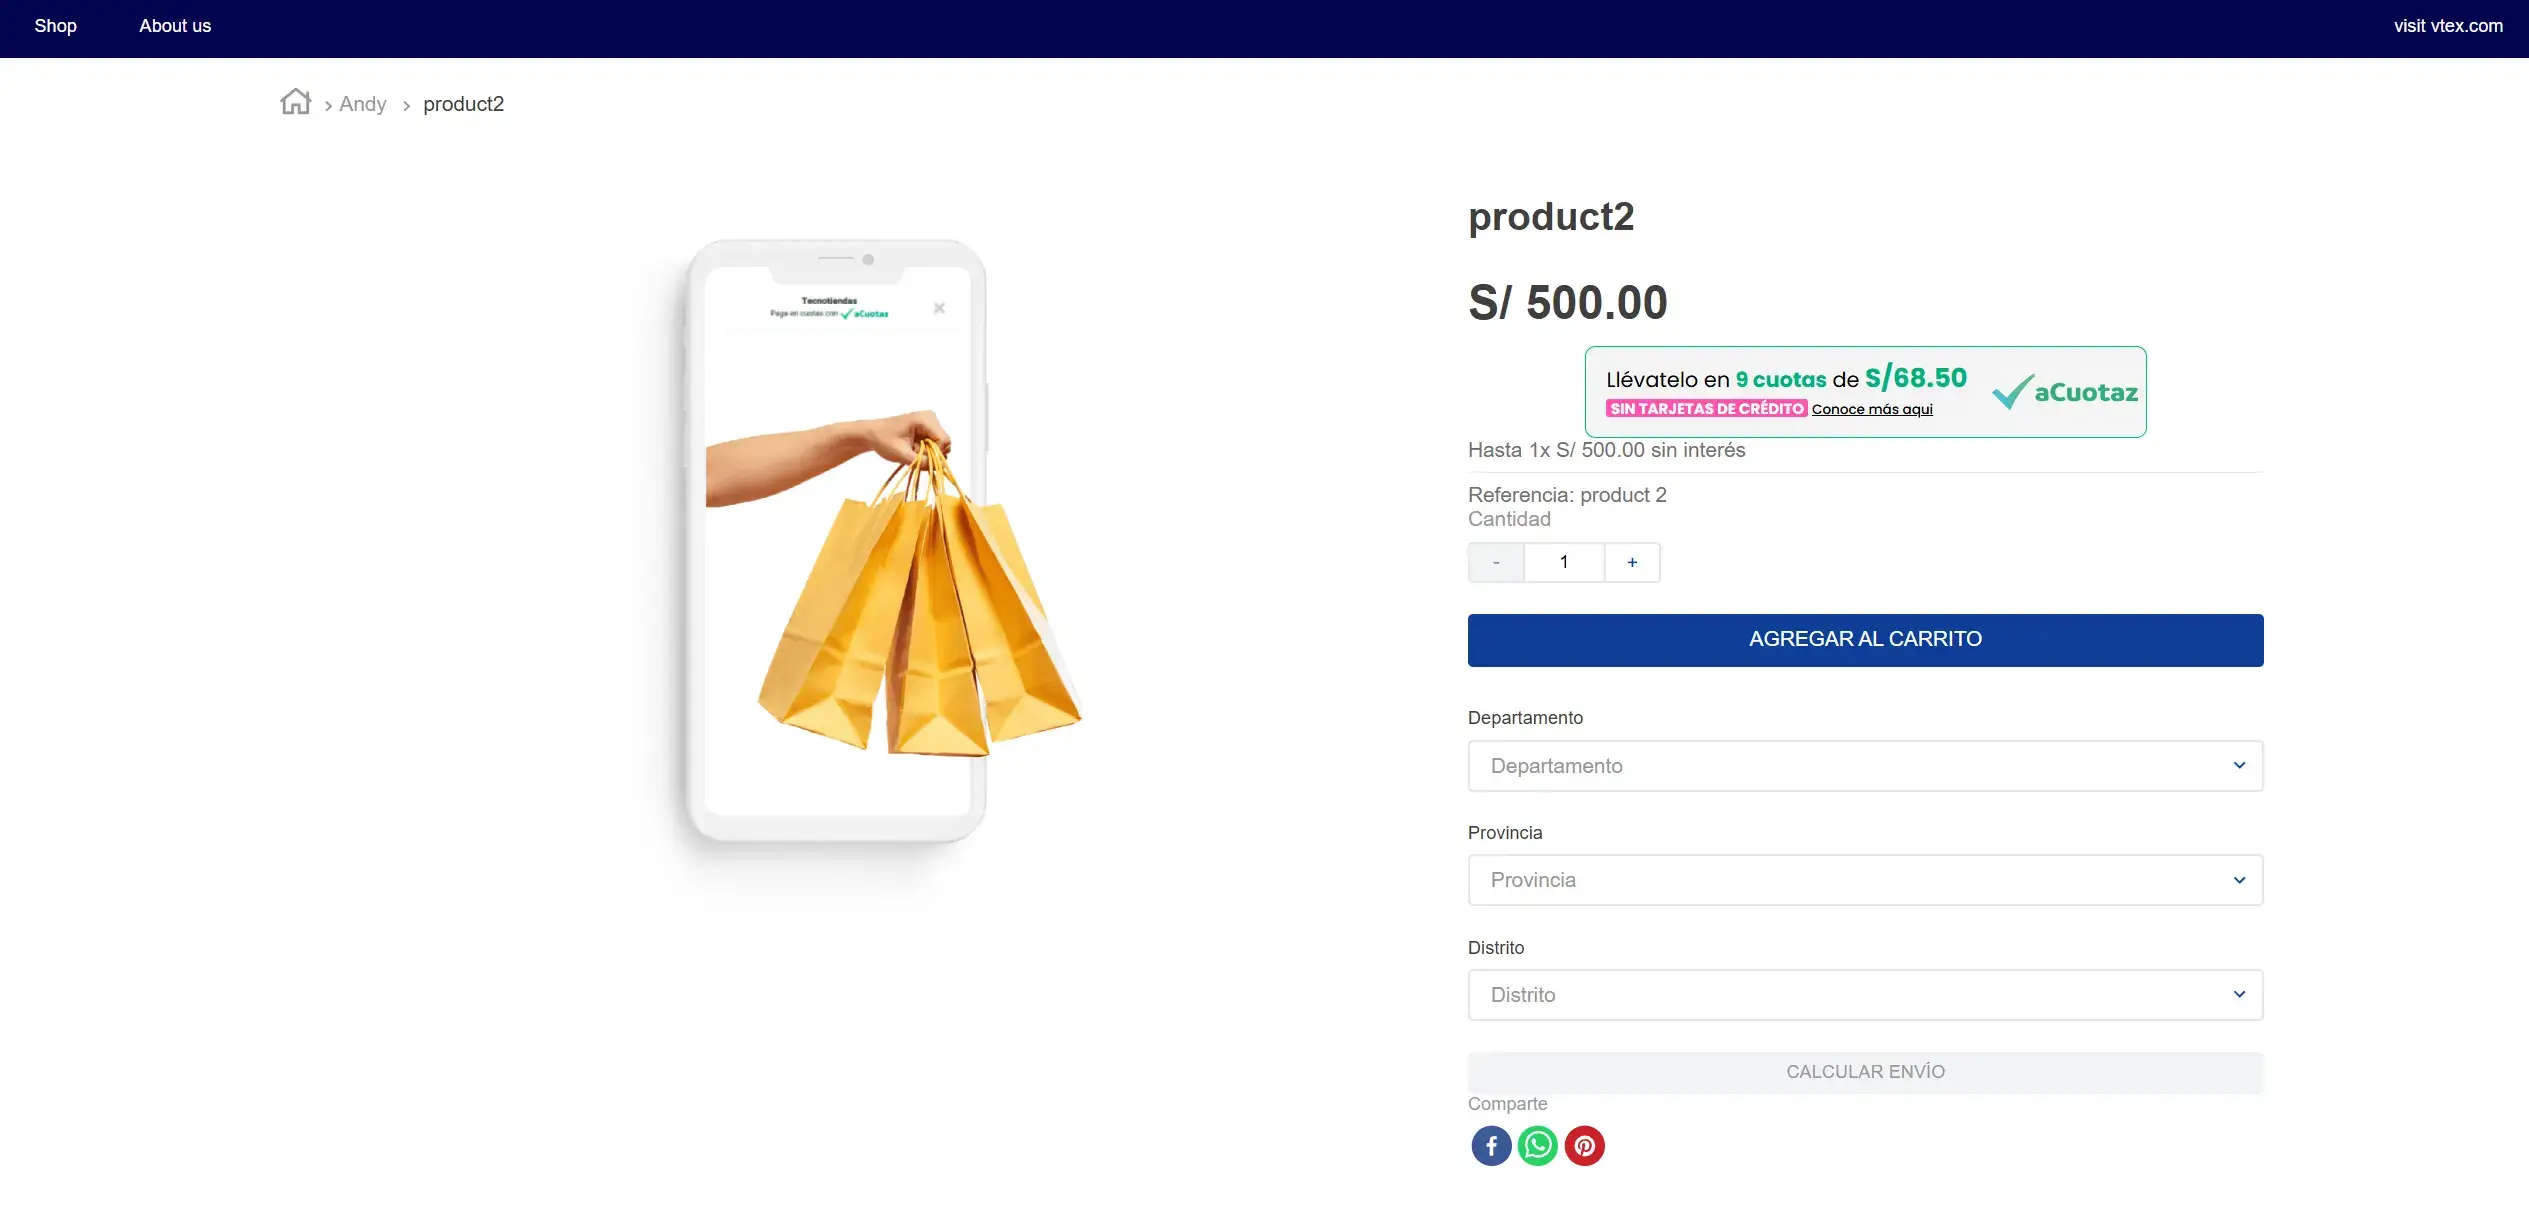
Example: Before and After
Here you can see examples of how the checkout should look before and after configuration:
Before:
After:
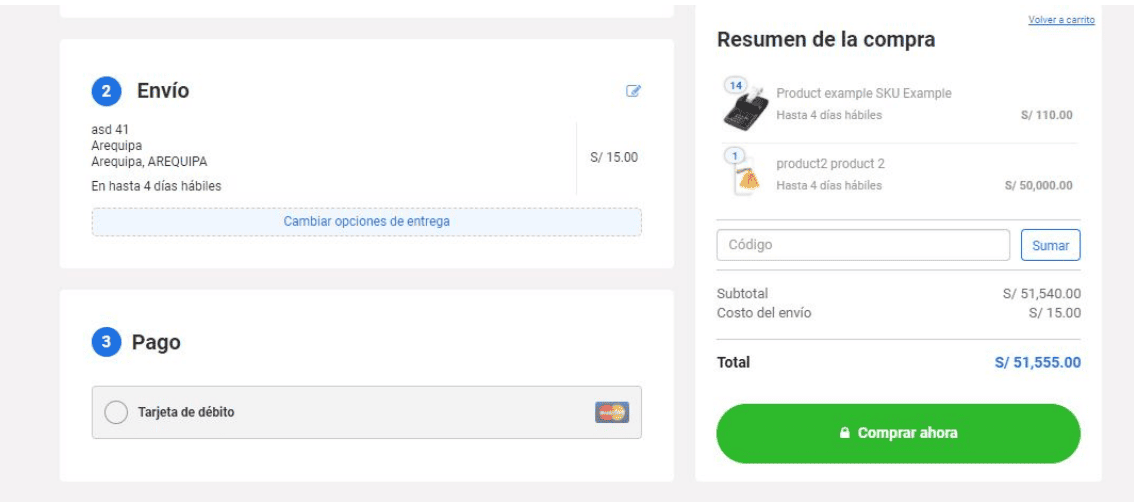
For purchases outside the funding limits, aCuotaz will no longer be displayed (check the price)
4. Set Up Our Widgets
The app setup is covered in apurata/vtex-framework-acuotaz-widgets — complete that first, then add the widgets to your store's layout files as shown below.
JSON comments
The // comments in the snippets below are for illustration only. Remove them before saving — standard .json files do not support // comments.
aCuotaz-Headband
A banner displayed at the top of your store that shows aCuotaz payment information.
Usage in header.json
{
  "header-layout.desktop": {
    "children": [
      "acuotaz-headband",  // <- Add as the first child
      "flex-layout.row#1-desktop",
      "flex-layout.row#2-desktop",
      "flex-layout.row#3-desktop"
    ]
  },
  "header-layout.mobile": {
    "children": [
      "acuotaz-headband"  // <- Add as the first child
    ]
  }
}
aCuotaz-Addon
A component shown on the product page that displays aCuotaz installment options based on the product price.
Usage in product.json
{
  "flex-layout.col#right-col": {
    "props": {
      "preventVerticalStretch": true,
      "rowGap": 0
    },
    "children": [
      "flex-layout.row#product-name",
      "product-rating-summary",
      "flex-layout.row#list-price-savings",
      "flex-layout.row#selling-price",
      "acuotaz-addon",  // <- Add after selling price
      "product-installments",
      "product-separator",
      "product-identifier.product",
      "sku-selector",
      "product-quantity",
      "product-assembly-options",
      "product-gifts",
      "flex-layout.row#buy-button",
      "availability-subscriber",
      "shipping-simulator",
      "share#default"
    ]
  }
}
After saving your layout files, run vtex link (development) or vtex deploy (production) to apply the changes to your store.
5. Testing
To test the integration, follow the instructions in our Testing Guide.
Do not forget:
Note: Use your test credentials for all testing steps below.
- Obtain your credentials via email from Apurata. See step 5 in the "Configure aCuotaz as Provider" section and enter them in the Client ID and Secret Token fields respectively.
- Place several test orders using aCuotaz as the payment method, use different cart amounts (below, within, and above expected funding limits).
- In each case, verify that the aCuotaz widget loads correctly in the VTEX checkout only if the cart amount is within the funding limits, and that the aCuotaz option does not appear when the cart amount is outside the funding limits.
- Review your orders dashboard to confirm that orders from VTEX are received with the correct amounts and metadata.
- If any result looks incorrect, share screenshots and order IDs with the aCuotaz support team so they can adjust configuration or funding limits.
6. Go Live
- Once testing is complete and validated, replace test credentials with your production credentials in the aCuotaz provider configuration (same place as step 5 in the "Configure aCuotaz as Provider") and ensure the same aCuotaz script (Mocker) is still active in VTEX checkout with the correct
clientId(see step 4 in "Configure Payment Mocker & Funding Limits"). - Place at least one small real order with aCuotaz from your production store to validate that the checkout flow works end-to-end and that the order appears correctly in VTEX and in aCuotaz.
- Inform your commercial / operations teams that aCuotaz is live so they can monitor initial orders and support customers during the first days of usage.
- If you need to change funding limits or visual behavior in the checkout, coordinate with the aCuotaz team; they may provide an updated script or configuration.